
Before jumping into animation I returned to one of my original references, Izzo by The Line. They had shared some very useful behind the scenes footage which allowed me to see more closely how they moved from roughs to finished product. This breakdown helped me understand how I could achieve the quality I was going for by following the same steps.
The breakdown showed how The Line take a shot from the storyboard phase all the way to final animation.


WORKFLOW
ROUGHS
When moving from my storyboard to my animatic I first assessed how much action was present in the shot. A number of my shots involved full body movement and complex body mechanics. When approaching these shots I was intimidated by the complexity of the movement and looked at references for help.

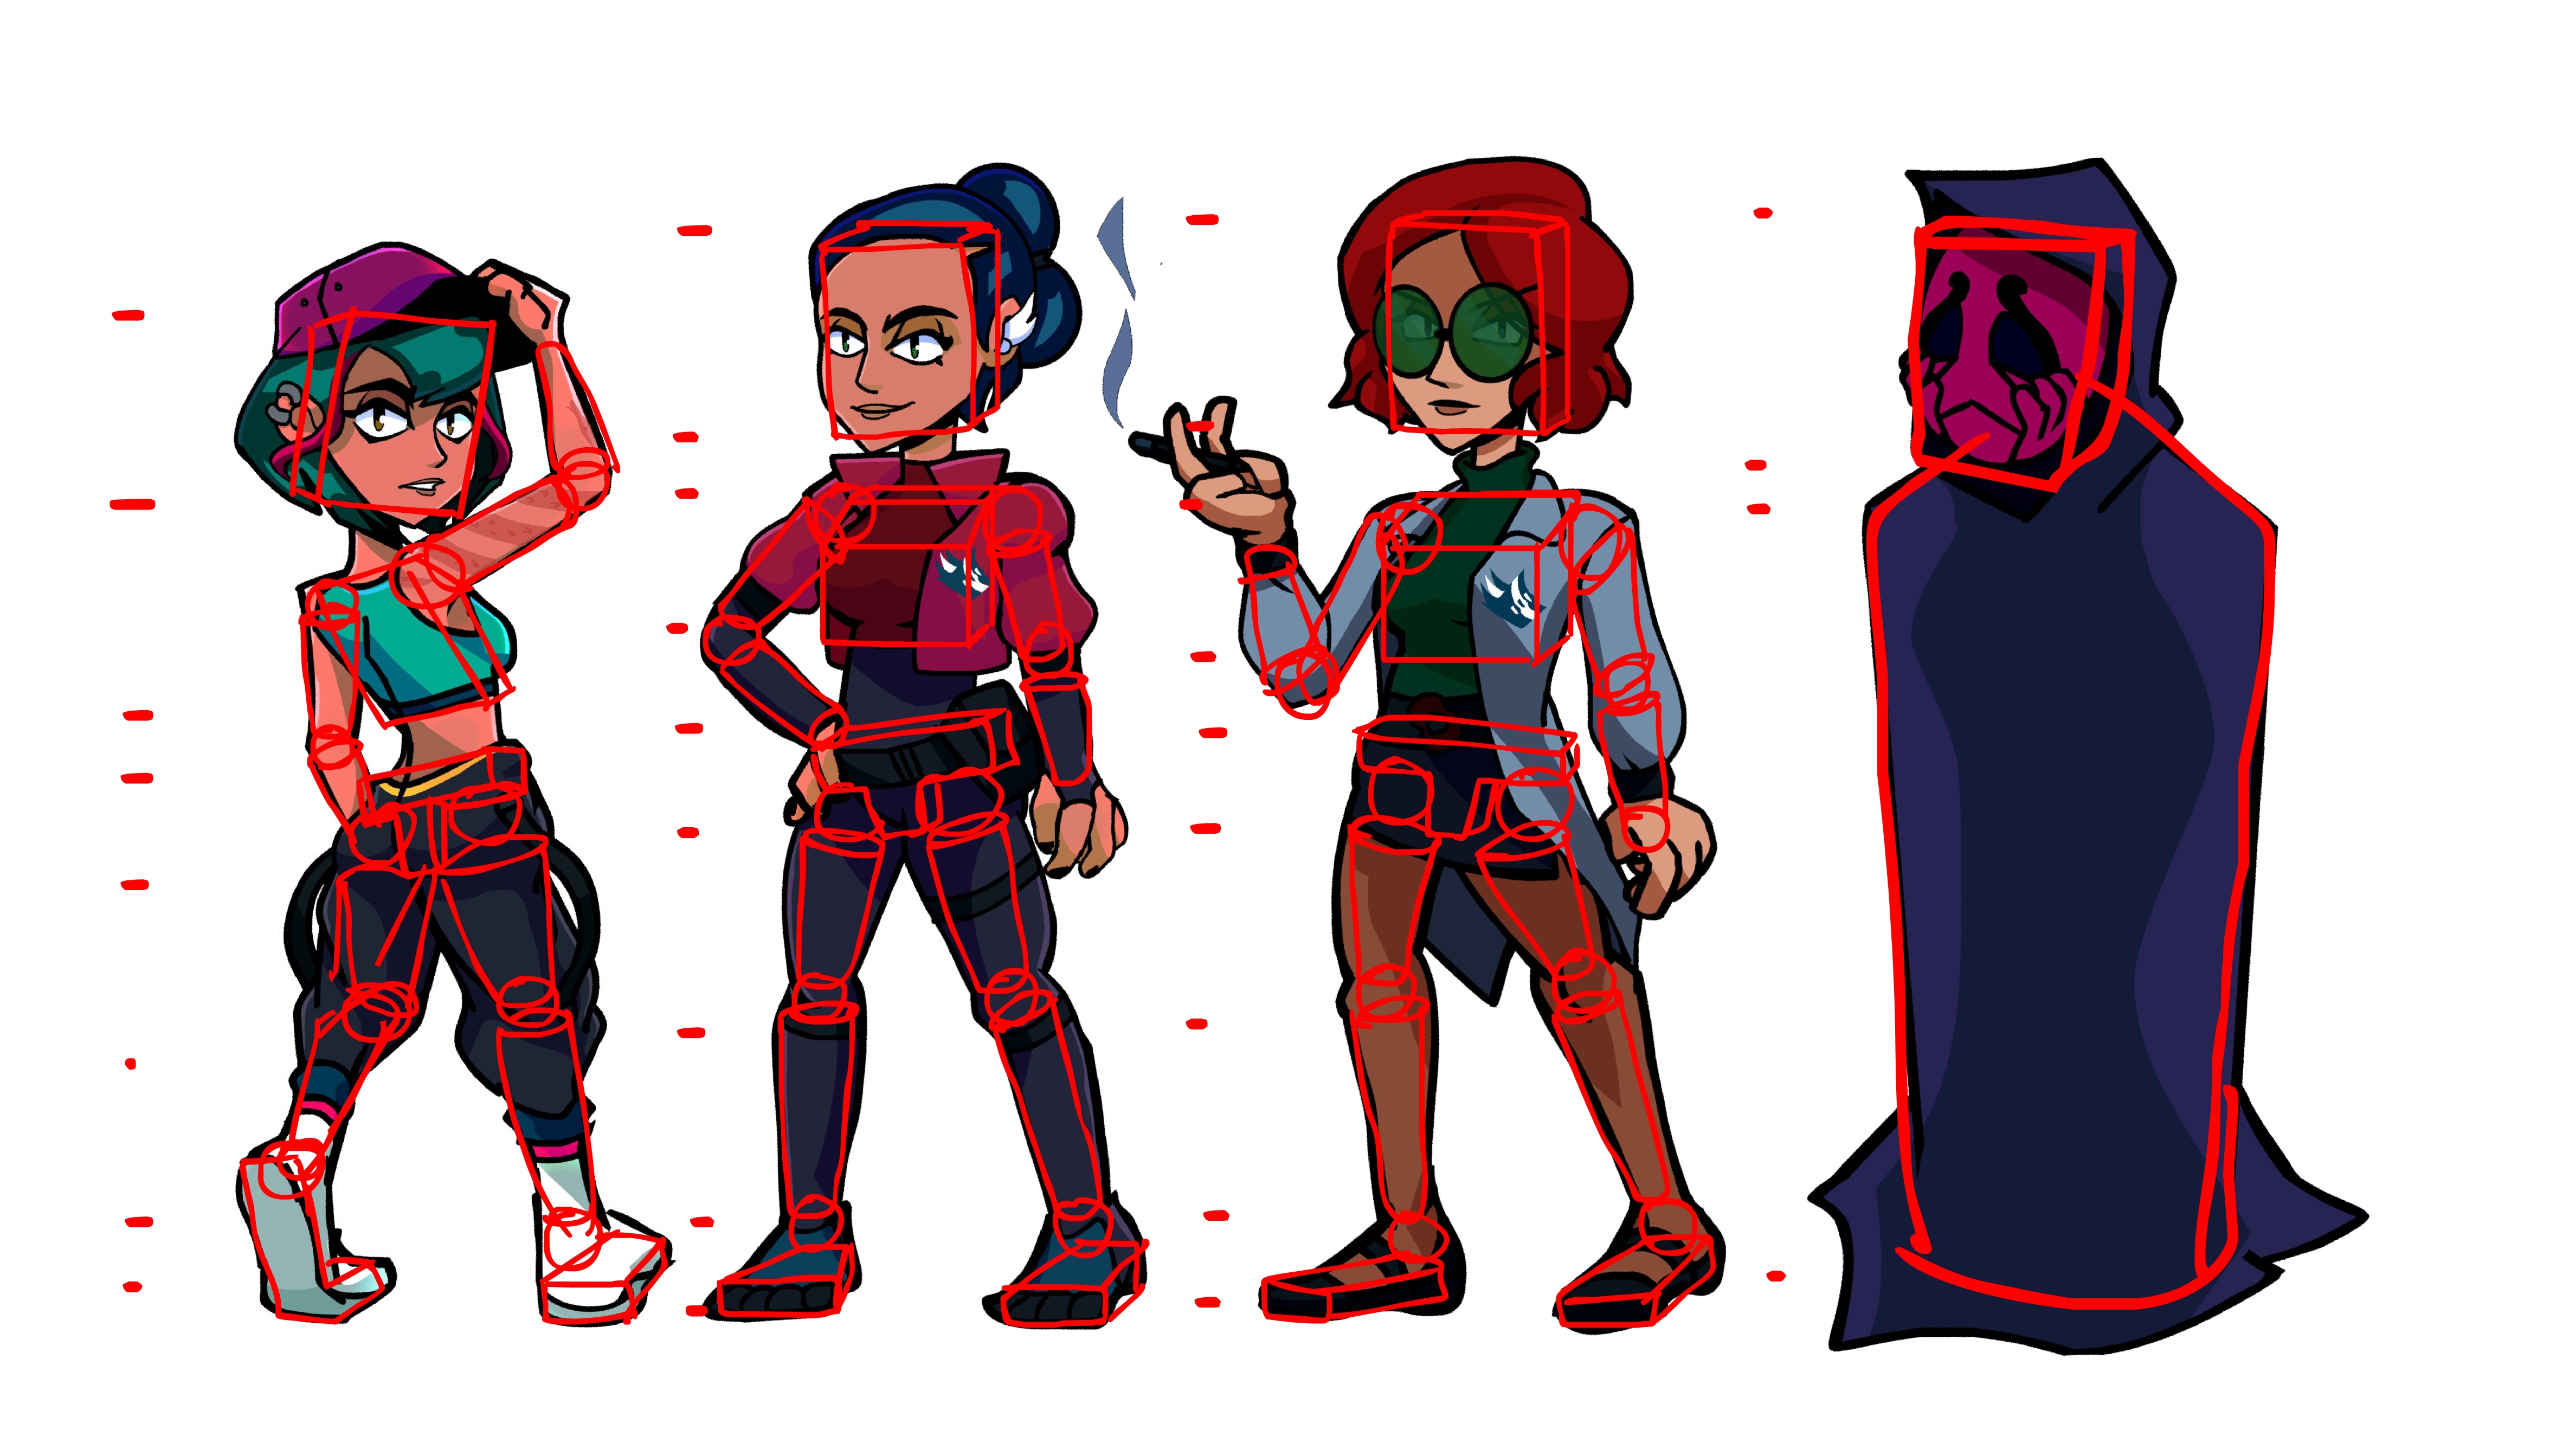
It seemed to me that for my most complex shots an extra rough pass would be required to get the movement correct before worrying about details like clothes, hair etc. I was inspired by an artist called BearTheMighty on instagram. They often provide blockouts for all their illustrations using geometric objects to show their technique for posing and proportions.


These simplified boxy frames gave me an idea for how I could go about staging my complex actions through boxy puppet versions of my characters. I used my existing character references and roughly sketched over some boxy proportions. These would work as substitutes for the early animation pass.

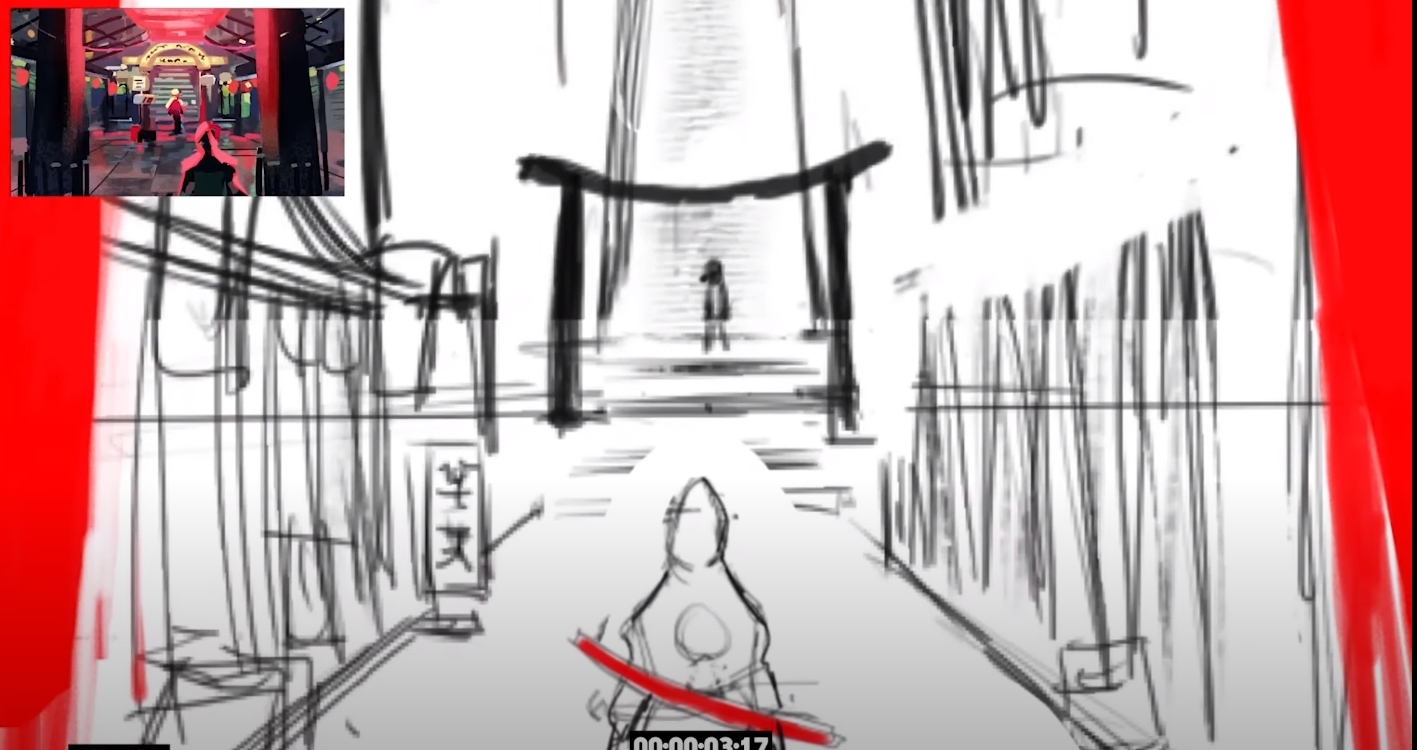
Here is a complex shot from my animatic. The action roughly depicting here is as follows:
- Erica busts out of the door.
- She accidentally runs into the opposing wall before gathering herself and running towards camera
- The two cultists appear slightly behind and begin to pursue.
The first step is to provide a geometric outline of the background, in doing so creating depth and making perspective clear in order to begin animating.

Using my puppet Erica I blocked out the action without much concern for timing yet. Once the required keyframes are done I can play with timing to see what sells the movement best.

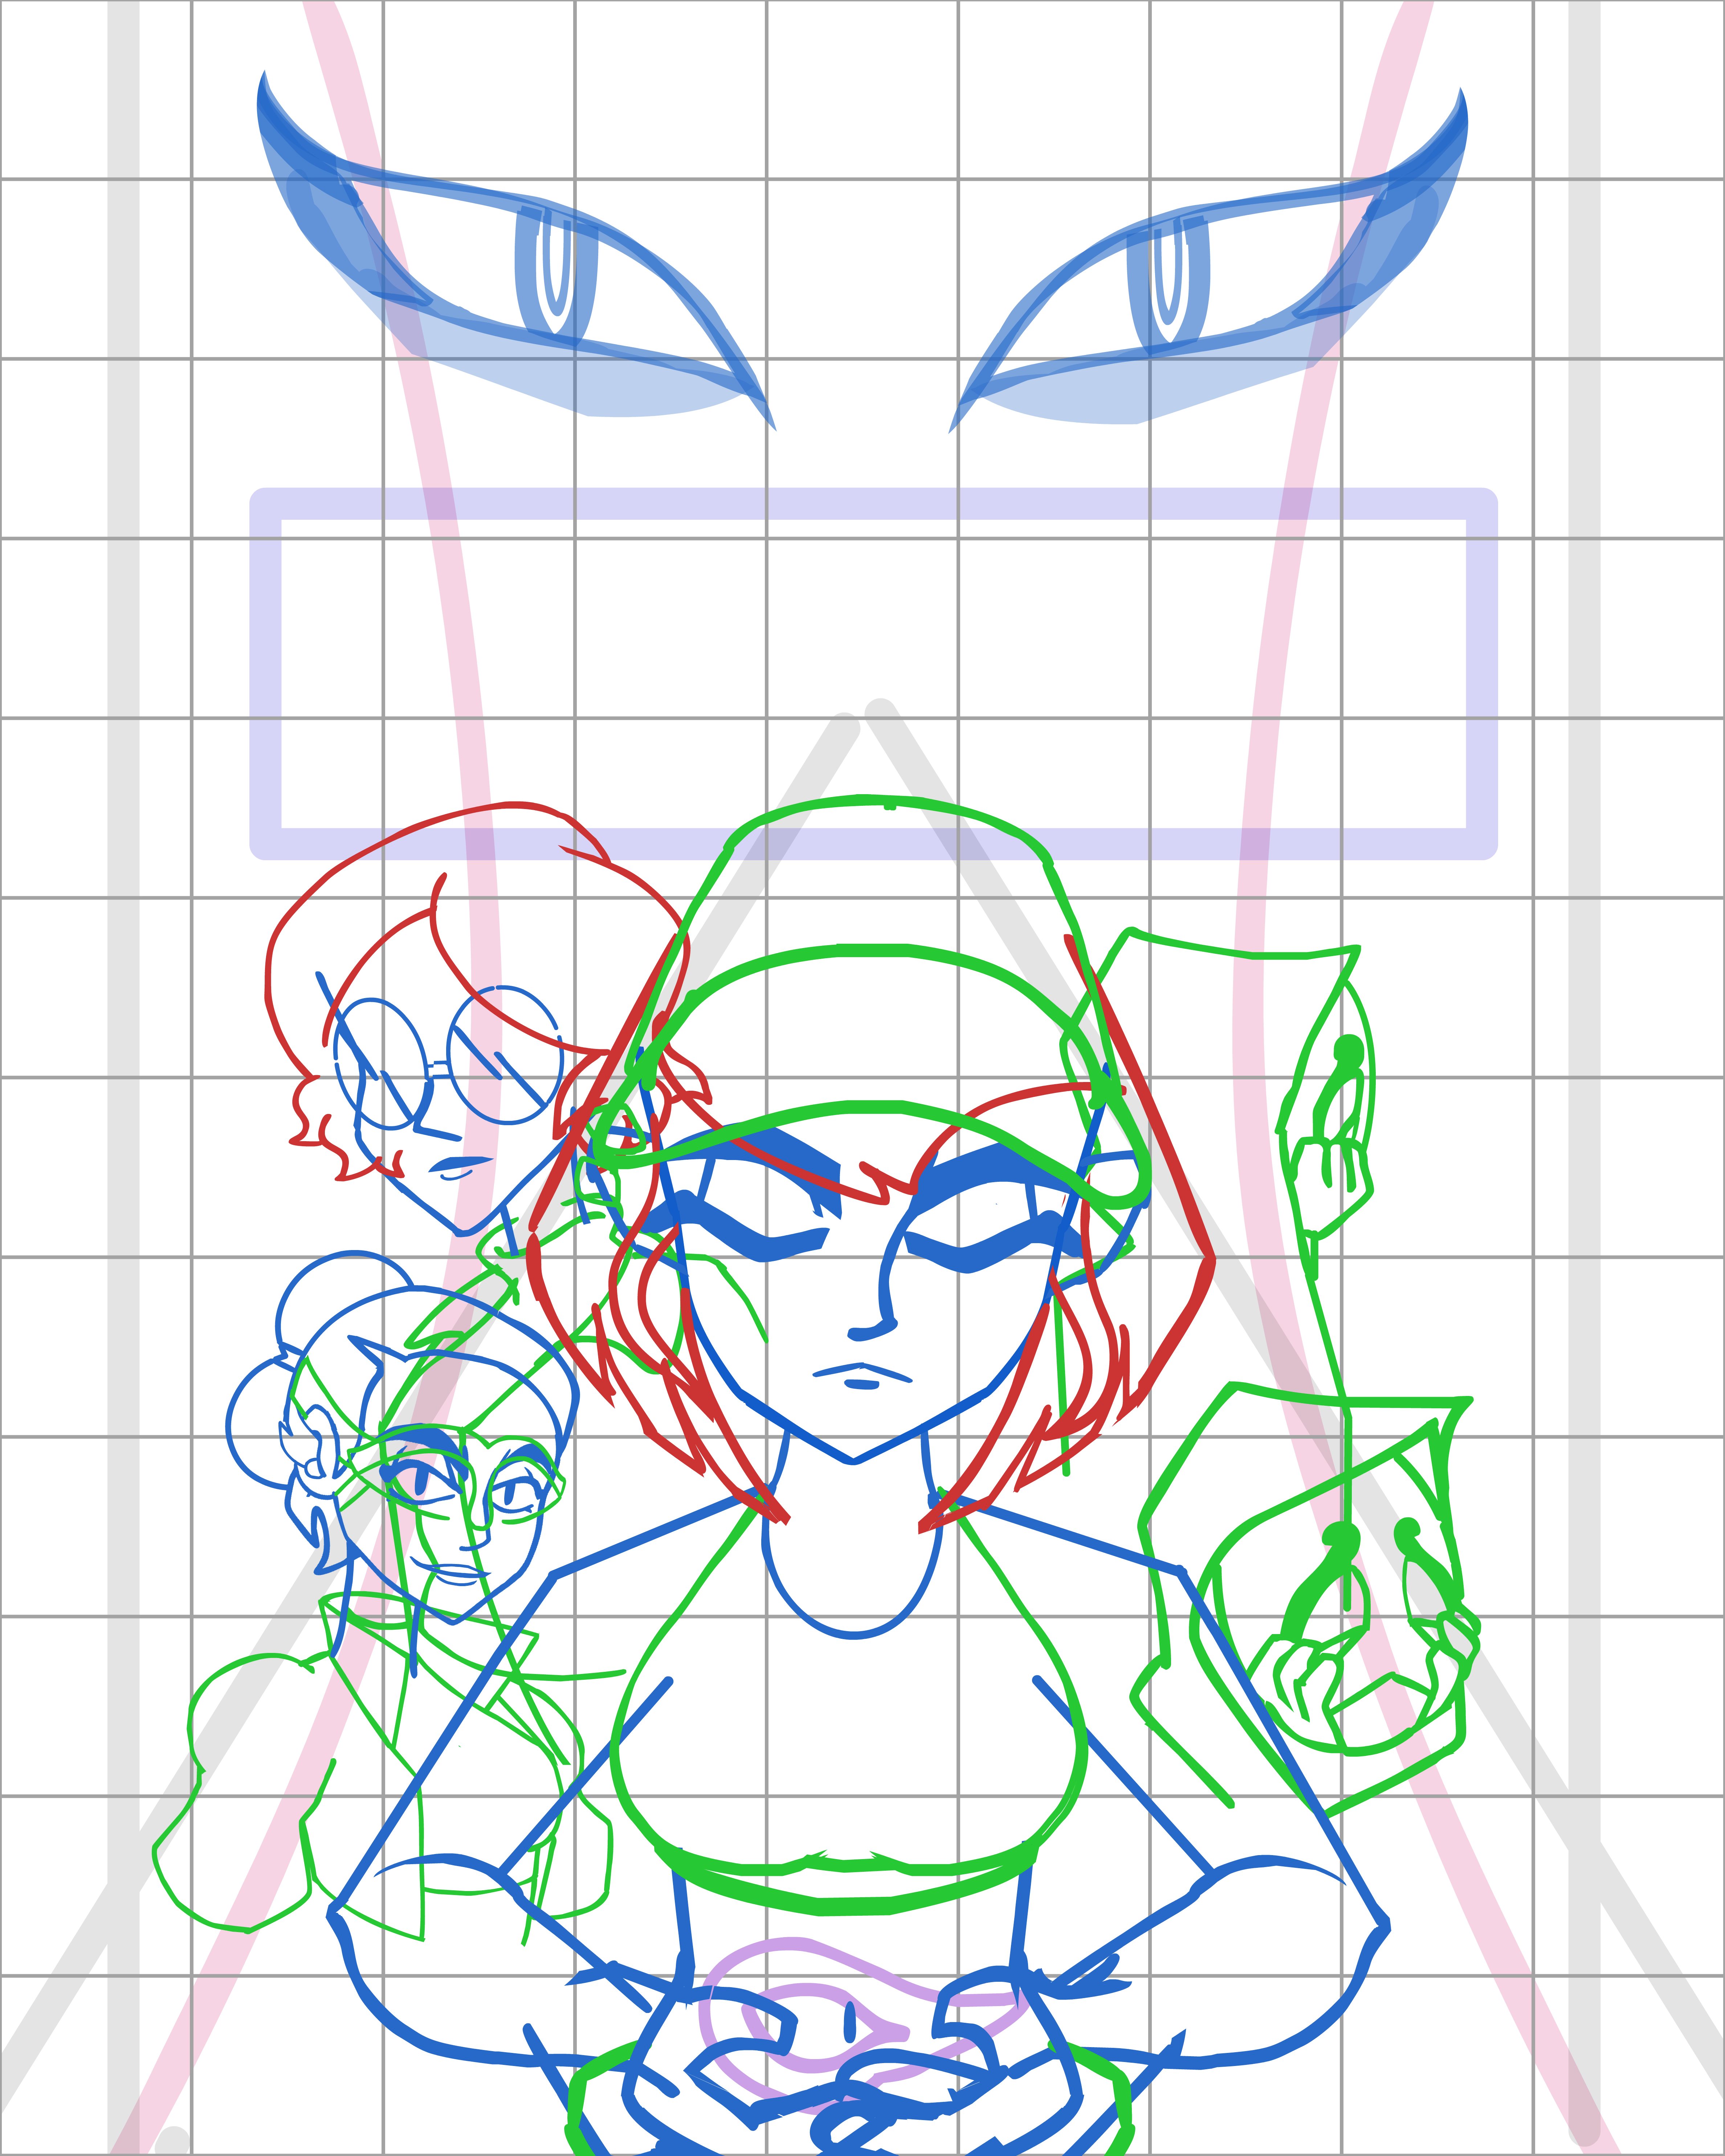
The next step was to add animation for the door, adjust timing and create a colour coordinated rough. This was a step that I did not put into practice when creating my commissioned stream intro as part of my side projects. During that production my roughs were all black and not correctly distributed to layers for each character element. This was a useful mistake and I quickly learned proper technique. I also looked up some rough animations online to decide on the best way to colour code and block out these elements.

I decided on:
- Blue for Skin and Face
- Red for Hair
- Green for Clothes
- Purple for Props and Miscellaneous Animation

I then began to rough out animation for the cultists. I wanted their mysterious physical designs to be reflected in their movement. Since they are cloaked from head to toe I decided that they should move like floating spectres. In order to achieve this effect I brushed up on my 12 principles. Specifically Follow Through and Overlapping Action.
I first animated using the masks alone to lead the movement. I then simulated the drag on a long piece of string to see how this would react to the movements of the head.

Using this action to inform the movement of the cultists’ cloaks and then removing the string created the slinking ghostly movement I was aiming for.

CLEANUP
From here the animation is cleaned and final linework is completed so that colour can be added.

COLOUR
The colour pass can be time consuming depending on the complexity of the scene. This shot in particular is quite detailed with lots of different elements.

Thankfully due to my experience in flash I have learned a technique that can raise the production value significantly and efficiently by adding shadows. Rather than making frame by frame shadows from scratch I instead group the animation from each character into a separate Object. By Flipping Vertically and Transforming I can duplicate the character animation underneath. From here I Tint this object, adjust the Alpha and change the blending mode to Subtract. The result is what you see below.

BACKGROUND
The next step is to add background and environmental elements. Most of these are created from scratch per scene, using the basic geometric block out as a template. In anticipation of the large workload I took the time to create a library of props and assets to populate my scenes with.


These assets provide complexity and appeal to an otherwise basic shot in a very efficient way. The are deliberately silhouetted so that they can be combined seamlessly with other assets and adjusted in tone to create depth.

The final step is some subtle post-processing, completed in Photoshop by converting the video to a smart object and applying an automated list of effects chosen by me. Done!

In this example a slightly different technique is applied. This shot has far less movement with a focus on facial expression. It poses a completely different challenge to the previous action scene. Here the subtle movements and consistency from frame to frame means that attempting to clean up and colour frame by frame is not only incredibly inefficient, but will likely result in mistakes that are clearly noticeable.
For this reason each animated element must be carefully split into its own discrete layer and stacked correctly in order to create the clip you see below. With the exception of a few elements like the mouth, eyes, eyebrows etc. all of the colouring is completed on a single frame and saved as an Object. It can then be manipulated using transformations.

Backgrounds and post-processing are added as usual.

The most ambitious shot in my film is at the climax of the fight scene. Erica is attacked by the cultist as they wield a knife. The choreography required for this shot was very difficult to plan and I was not immediately sure that I would be able to achieve it. My main inspiration for the action and choreography again came from Izzo.

Using this shot as a reference I began staging the action. When it came to choreography I planned in reverse. Using puppet Erica I roughed out her using speed and agility to dodge a knife that wasn’t there yet. I decided that leading with Erica’s reaction would create a more interesting exchange than starting with the knife, or considering both at once.

From here I roughed the cultist’s animation using a similar technique to before. This time the movement was primarily lead by the knife, with the mask following and subsequently the string. Which would be used to inform the cloak movement in the next rough pass.

As I moved to the colour coded rough I could see already that the action was working well. By having Erica lead the action it allowed me to animate the knife in a convincing way. Both characters operate independently and neither appears to be waiting on the other or conveniently missing an easy blow.

This was again one of the more difficult shots to colour due to the multiple characters, number of frames and dynamic action.

Applying the shadow pass to these massively aids production value and enhances the sense of depth and proportion in the scene.

Backgrounds are again assembled using a combination of elements made from scratch and assets from my prop library. Finally post-processing is applied.
FINALISING PRODUCTION
While I was making good progress in terms of my overall shot count I became increasingly aware of the ambition of my animatic and the amount of work left to do. I had already made contingency plans depending on how I handled the workload, ranking shots by importance (Essential, Preferable, Luxury) with the option of ending the short at the conclusion of the fight scene. Given how pleased I was with the character animation I produced felt that it was more important to guarantee my film was cohesive, rather than sacrifice quality to achieve the animatic length or potentially run out of time.
During this time I had also been in contact with voice actor Bailey Doxey. Who’s demo reel had caught my interest online. Bailey’s range covered the three main characters, and with some subtle audio editing I made these more distinct.
As I had previously anticipated, the audio edit and timing of my detailed animatic aided massively when it came to editing my final film. For the most part I could simply swap out the animatic shots for complete versions with little extra effort. This meant that over time I could see clearly how well complete sequences of my film were looking and how much I had left to do. The music from my original animatic was temporary and I reached out to a musician friend of mine who goes by Killer Bee online and requested to use a track from his discography, which he gladly accepted.
I felt that this track “SP23” perfectly fit the mood and tone of my dystopian sci-fi setting. The track progression also features high and low energy points, which I could use effectively to match the mood and energy of a given scene. With some audio editing I could rearrange these sections to create a dynamic soundtrack for the film.
Using the original animatic as a base with adjustments for timing and reduced length, the final edit of my film was assembled in Premier Pro.
FILM PORTFOLIO
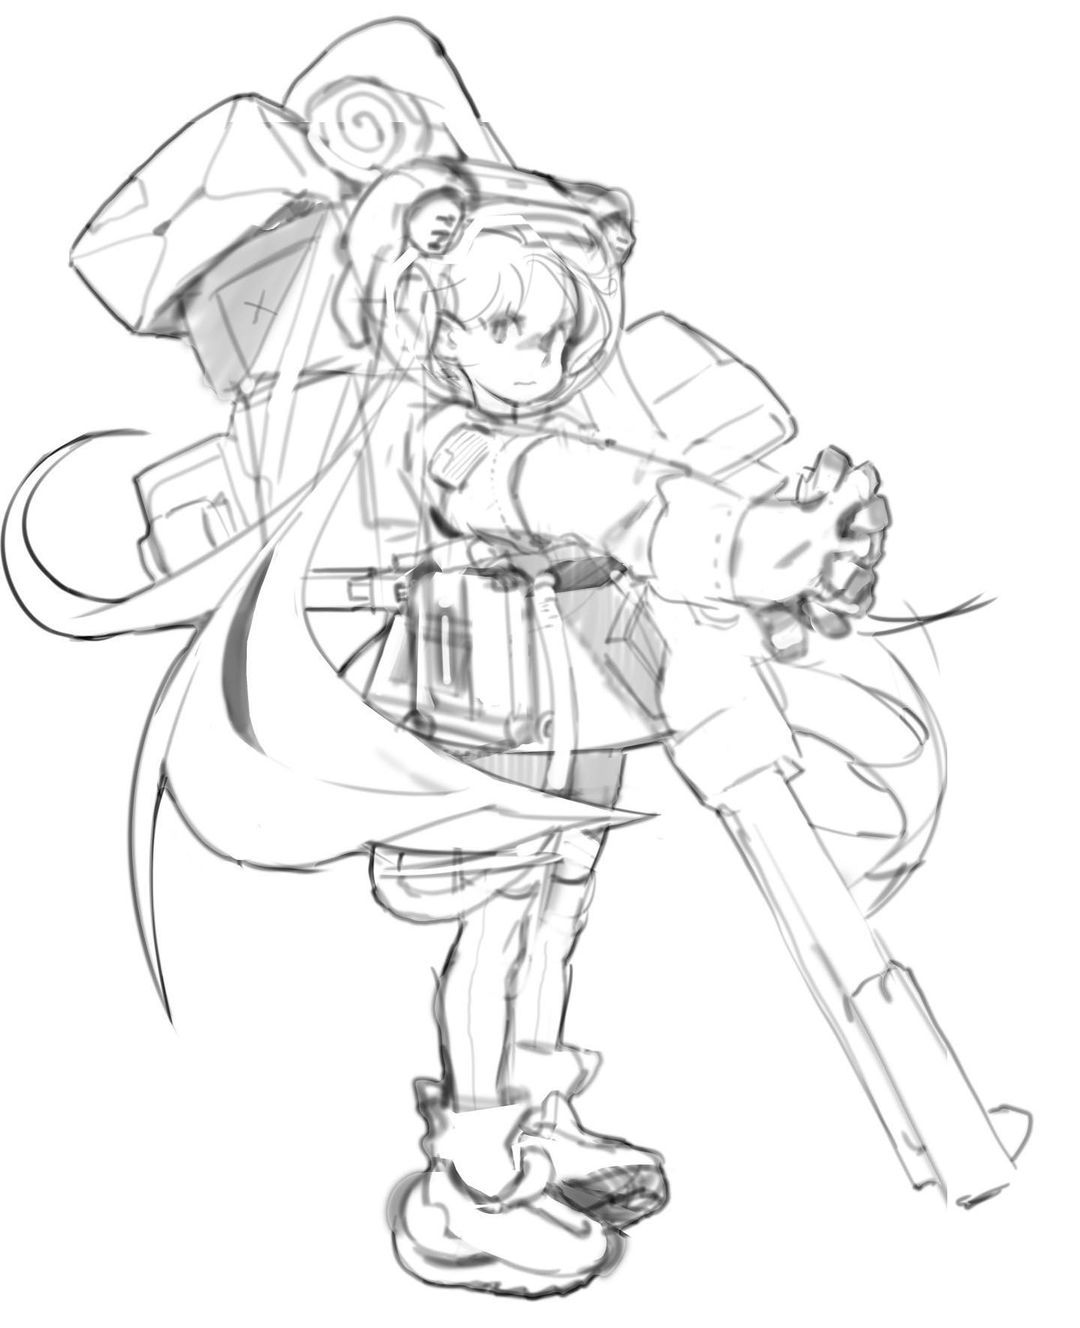
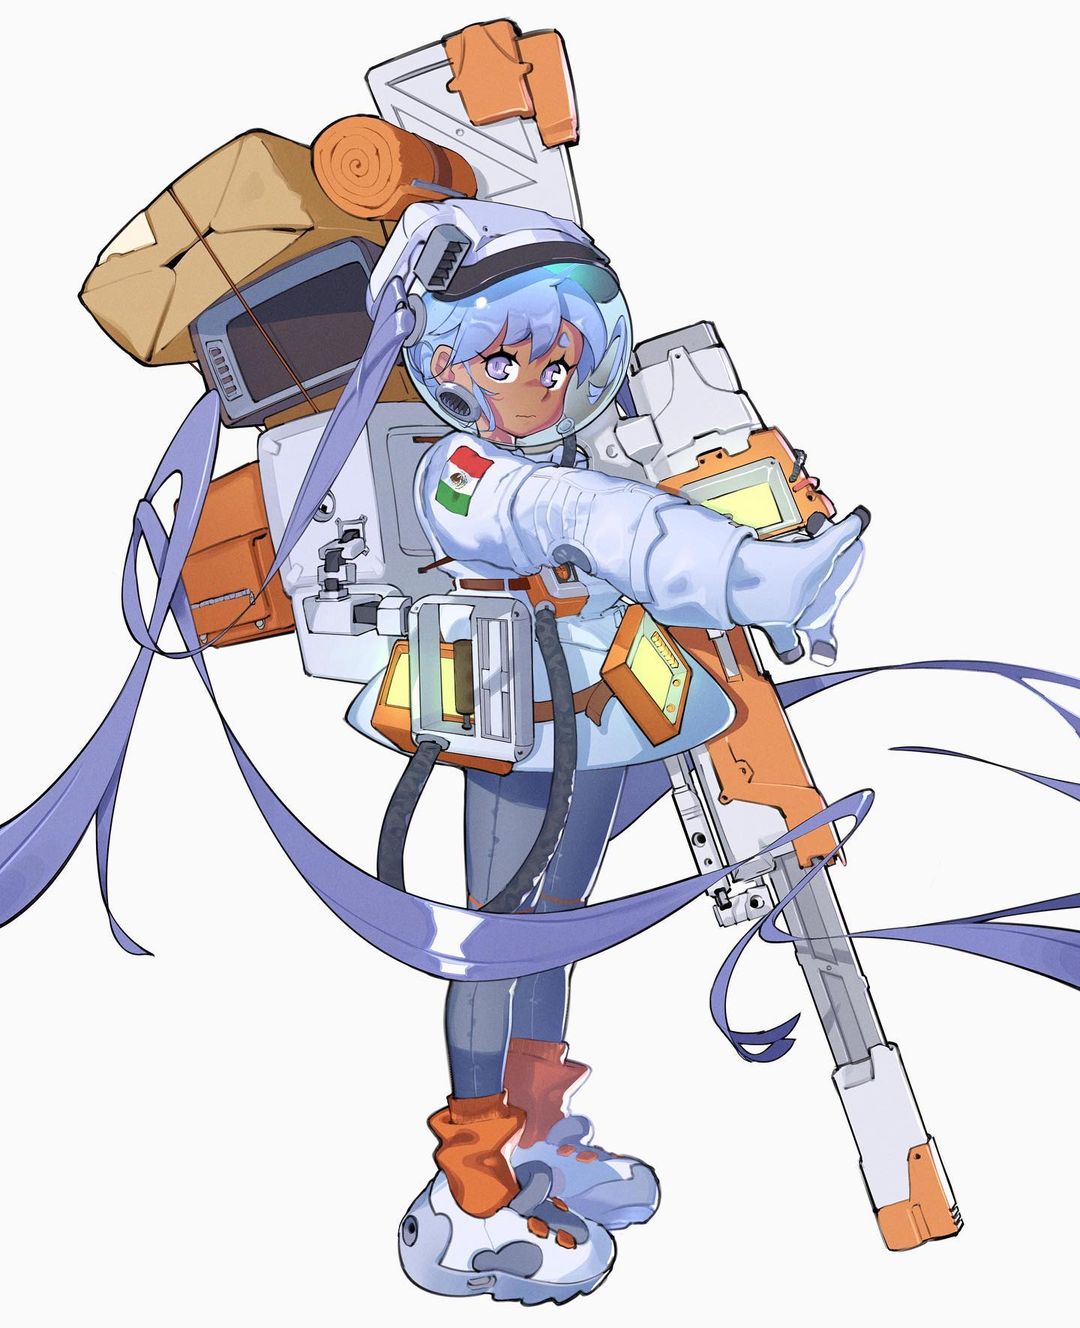
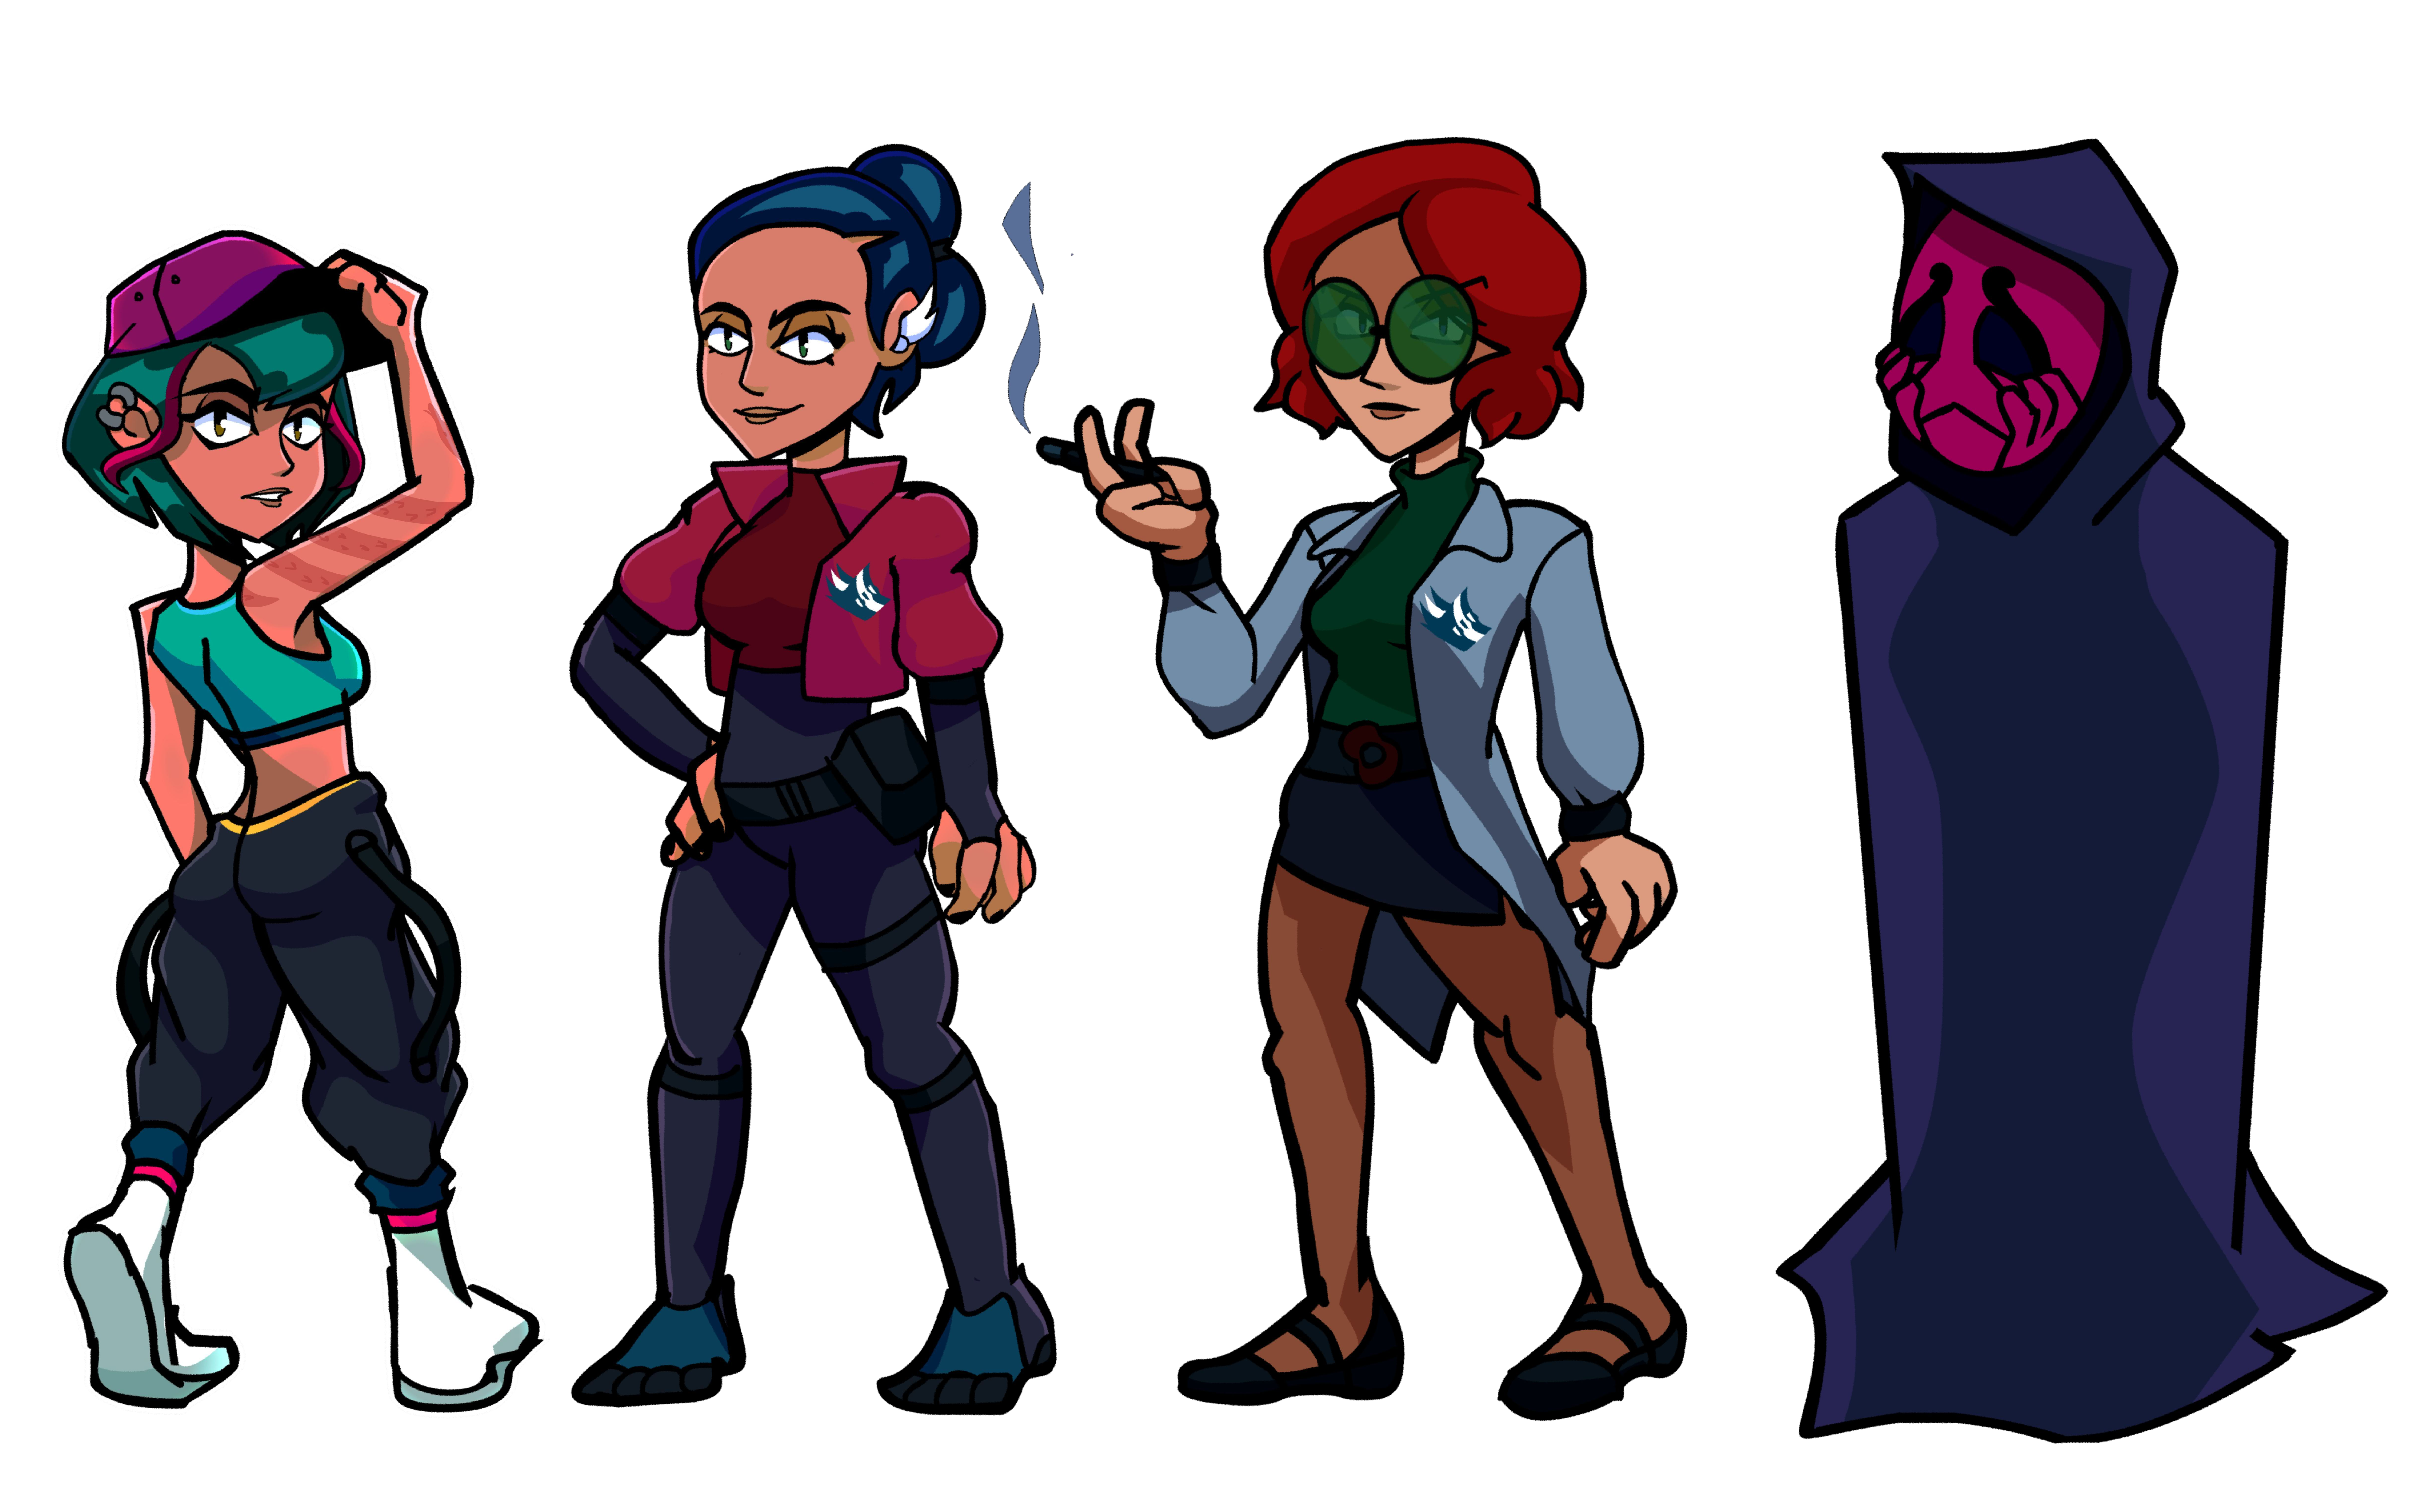
CHARACTER DESIGN
POSTER


ANIMATION and backgrounds


REFLECTION
I entered into Final Year with ambitious ideas for my project, both in terms of narrative scope and complexity of animation. This was a deliberate challenge for myself, to test my ability and to set a new bar to aim towards. Now that the year is complete I have learned from these early decisions in many ways. Firstly setting the bar for animation quality much higher than my previous ability forced me to tackle complex shots and detailed character animation. I was not aware this was something I would be able to achieve and I am therefore deeply pleased with the quality of animation work I produced. While I partially regret not taking the time to learn a more advanced software package like Toon Boom or Animate in anticipation of final year, I can say with some confidence that my familiarity with Flash allowed me to work as quickly as I did and complete a larger workload overall.
I also learned from my narrative ambitions. My intention to structure my film as an “intro” or “teaser” for a larger universe did allow me to be creative with world design and informed a lot of my decisions regarding characterisation and plot. I spent a lot of time revising my script in order to communicate as much as possible about the world and characters in a limited time while remaining clear and engaging. Unfortunately since I did not complete all that I planned in my script and animatic the time spent making these careful revisions were ultimately wasted. My philosophy when writing an open ended script was to create questions of intrigue rather than questions of confusion. While I still believe that my final film is cohesive, I hope it is still readable and engaging to first time viewers. When reflecting on my ideation process I understand the motivations behind my narrative ambitions, but in hindsight I would have made efforts to significantly reduce the script or alternatively write a self-contained narrative.
It is also worth reflecting on the various side projects that I completed over the past year, both freelance and personal. Time spent working on the animated stream intro for GJReggie was especially useful, both as a portfolio piece and as practice for my final film. Serving as my first longform 2D animation in years I was able to build my confidence and practice my ability in anticipation of animation for my major project. This was the most significant distraction from my major project, but I think the positive impact it had on my ability significantly raised the quality of animation in my final film. My position when accepting and putting time towards these projects was that more credentials, experience, higher volume of work and a more varied skillset to showcase in my portfolio would overall be more valuable than dedicating this time entirely to my major project. I still believe this to be true, and while I can now clearly see how this compromised the production of my film I am still ultimately very pleased with the final outcome. I am proud of the quality and volume of work I have produced over the past year and I believe that my work both inside and outside of university have contributed to making me a more experienced and professional artist.
